Description:
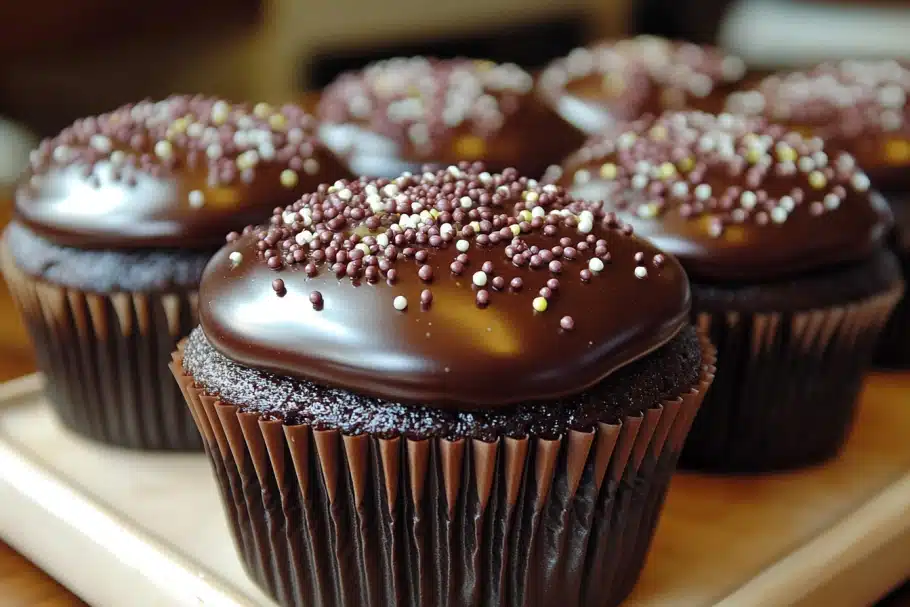
Indulge in a nostalgic trip down memory lane with these homemade Hostess Cupcakes. These aren’t just any cupcakes; they’re a labor of love that recreates the iconic treat we all remember from childhood, but elevated with fresh ingredients and homemade goodness. Each bite is a symphony of flavors and textures: a moist, chocolatey cupcake base, a fluffy marshmallow creme filling, a rich chocolate ganache coating, and the signature vanilla icing swirl. This recipe allows you to craft a dessert that is both familiar and undeniably special, perfect for satisfying your sweet tooth and impressing friends and family. Prepare to experience the delightful combination of decadent chocolate, creamy marshmallow, and delicate vanilla in every delicious layer. Making these cupcakes from scratch might seem daunting, but the result is well worth the effort. The superior taste and quality of homemade ingredients will make you question why you ever settled for the store-bought version.
Why You Will Love This Recipe:
- Nostalgia with a Twist: This recipe brings back childhood memories of enjoying a classic Hostess Cupcake, but with a gourmet, homemade upgrade.
- Superior Flavor: Forget the processed taste of store-bought versions. This recipe uses fresh, high-quality ingredients, resulting in a richer, more satisfying flavor profile.
- Perfect Texture: The combination of a moist cupcake, fluffy filling, and smooth ganache creates a delightful textural experience.
- Impressive Presentation: The signature vanilla icing swirl adds an elegant touch, making these cupcakes perfect for parties, gatherings, or a special homemade treat.
- Customizable: While this recipe stays true to the classic flavor profile, it offers opportunities for personalization, such as using different types of chocolate or adding extracts to the filling.
- Satisfying Project: Baking these cupcakes from scratch is a rewarding experience that allows you to take pride in your creation.
Ingredients:
For the Chocolate Cupcakes:
- 1 cup (130g) all-purpose flour
- 1 cup (207g) granulated sugar
- 6 tablespoons (43g) unsweetened cocoa powder
- 1 teaspoon baking soda
- 1/2 teaspoon salt
- 1 large egg
- 1/2 cup (120ml) milk
- 1/2 cup (120ml) vegetable oil
- 3/4 teaspoon vanilla extract
- 1/2 cup (120ml) hot water
For the Marshmallow Filling:
- 1/4 cup (56g) unsalted butter, softened to room temperature
- 1/2 cup (58g) powdered sugar
- 5 ounces marshmallow creme
For the Chocolate Ganache:
- 4 ounces (113g) semi-sweet chocolate chips
- 6 tablespoons (90ml) heavy whipping cream
For the Vanilla Icing:
- 2 tablespoons unsalted butter, softened
- 1/2 cup powdered sugar
- 1 tablespoon milk
- A splash of vanilla extract
Preparation:
Step 1: Preheat and Prep
Preheat your oven to 300°F (148°C). This lower temperature ensures a moist, tender cupcake. Line a 12-cup cupcake pan with paper liners. This not only prevents the cupcakes from sticking but also makes for easy cleanup. The lower temperature is crucial for a moist and evenly baked cupcake, preventing them from drying out or developing a tough crust.
Step 2: Combine Dry Ingredients
In a large mixing bowl, whisk together the flour, sugar, cocoa powder, baking soda, and salt. Whisking ensures the ingredients are evenly distributed, especially the baking soda, which is essential for the cupcakes to rise properly. Using a whisk aerates the dry ingredients, resulting in a lighter, more tender cupcake.
Step 3: Combine Wet Ingredients
In a separate medium bowl, whisk together the egg, milk, vegetable oil, and vanilla extract until well blended. Ensure the egg is fully incorporated to avoid any eggy taste or texture. The vegetable oil provides moisture, while the vanilla extract adds a subtle depth of flavor that complements the chocolate.
Step 4: Combine Wet and Dry
Pour the wet ingredients into the bowl of dry ingredients and stir until the mixture is fully combined. Be careful not to overmix, as this can develop the gluten in the flour, resulting in a tough cupcake. Just stir until the ingredients are incorporated and there are no visible streaks of flour.
Step 5: Add Hot Water
Gradually mix in the hot water, stirring until the batter is smooth and very thin in consistency. The hot water helps to bloom the cocoa powder, enhancing its flavor and creating a richer, more intense chocolate experience. It also contributes to the moisture content of the cupcakes, ensuring a tender crumb. The batter will be quite thin, but that’s perfectly normal.
Step 6: Fill Cupcake Liners
Spoon the batter into the cupcake liners, filling each a little over halfway full. This allows room for the cupcakes to rise without overflowing. Using a cookie scoop or measuring cup can help ensure each cupcake is filled evenly. An overfilled cupcake will not only create a mess in the oven, but it will also cause an uneven dome.
Step 7: Bake Cupcakes
Bake for 18 to 23 minutes, or until a toothpick inserted into the center comes out with a few moist crumbs. Start checking for doneness at 18 minutes, as baking times can vary depending on your oven. A few moist crumbs are ideal, as they indicate that the cupcakes are cooked through but still moist. Overbaking will result in dry, crumbly cupcakes.
Step 8: Cool Cupcakes
Remove the cupcakes from the oven and let them cool for 2 minutes in the pan, then transfer them to a wire rack to cool completely. Cooling them slightly in the pan helps them set before transferring them to a wire rack to prevent sticking and allows for better airflow. Ensure the cupcakes are completely cool before filling and frosting, or the filling and ganache will melt.
Step 9: Prepare Marshmallow Filling
Once the cupcakes are fully cooled, prepare the filling. Place the softened butter in the bowl of a mixer and beat it until smooth and creamy. Softened butter is essential for a smooth, lump-free filling. Use an electric mixer for best results.
Step 10: Add Powdered Sugar to Filling
Add half of the powdered sugar and mix until it’s fully incorporated and smooth. This may take a few minutes. The powdered sugar adds sweetness and structure to the filling. Adding it in two stages helps prevent it from clumping and ensures a smooth consistency.
Step 11: Add Remaining Powdered Sugar
Add the remaining powdered sugar and continue mixing until smooth. Scrape down the sides of the bowl as needed to ensure all ingredients are fully incorporated. A well-mixed filling will be light and airy.
Step 12: Add Marshmallow Creme
Add in the marshmallow creme and mix until everything is well combined and fluffy. The marshmallow creme provides the classic marshmallow flavor and creamy texture. Mix until just combined to avoid overmixing, which can cause the filling to deflate.
Step 13: Core Cupcakes
To fill the cupcakes, cut a small core from the center of each one using a knife or a cupcake corer. Be careful not to cut all the way through the bottom of the cupcake. The core should be about ¾ of the way down.
Step 14: Fill Cupcakes
Pipe or spoon the filling into the hollow centers, then replace the top part of the removed cake. You can trim down the piece before replacing it, as you won’t need the entire core with the filling inside. A piping bag will give you more control and precision when filling the cupcakes.
Step 15: Prepare Chocolate Ganache
To prepare the chocolate ganache topping, place the chocolate chips into a medium-sized heatproof bowl. Use high-quality chocolate chips for the best flavor.
Step 16: Heat Heavy Cream
Heat the heavy cream just until it starts to boil, then pour it over the chocolate chips. Do not boil the cream for too long or it will burn.
Step 17: Whisk Ganache
Let it sit for 2 to 3 minutes, then whisk until the mixture is smooth and glossy. Letting the cream sit allows the chocolate to melt evenly. Whisking gently will create a smooth, shiny ganache.
Step 18: Frost Cupcakes with Ganache
Spread the ganache over the top of each cupcake, covering it completely. If the ganache thickens too much as it cools, you can reheat it briefly—5 to 10 seconds in the microwave should make it spreadable again.
Step 19: Make Vanilla Icing
To make the decorative vanilla icing, beat the softened butter in a mixer bowl until smooth.
Step 20: Add Powdered Sugar to Icing
Add the powdered sugar and mix until it begins to come together—it may be a bit dry and clumpy at first.
Step 21: Add Milk and Vanilla
Add in the milk and a splash of vanilla extract, then mix until the icing becomes smooth and pipeable. Adjust the amount of milk as needed to achieve the desired consistency.
Step 22: Pipe Vanilla Swirl
Transfer the icing to a piping bag fitted with a small round tip (such as Wilton tip #3) and pipe the classic swirl design across the top of each cupcake. Practice on a piece of parchment paper before piping on the cupcakes to ensure you achieve the desired effect.
Step 23: Chill and Serve
Keep the cupcakes refrigerated until you’re ready to serve. For the best texture and flavor, let them sit at room temperature for a bit before enjoying. Serve cool, but not cold.
COOKING Rating:
Intermediate
Serving Suggestions:
- Serve as a dessert for parties, birthdays, or special occasions.
- Pair with a glass of cold milk or a cup of hot coffee.
- Add a scoop of vanilla ice cream for an extra indulgent treat.
- Package in individual boxes for a thoughtful homemade gift.
Tips:
- Use high-quality cocoa powder and chocolate chips for the best flavor.
- Ensure the butter is softened to room temperature for the filling and icing.
- Don’t overmix the cupcake batter to prevent a tough texture.
- Let the ganache sit for a few minutes before whisking to ensure the chocolate melts evenly.
- Refrigerate the cupcakes for at least 30 minutes before serving to allow the ganache to set.
- Store leftover cupcakes in an airtight container in the refrigerator for up to 5 days.
Prep Time:
30 minutes
Cook Time:
23 minutes
Total Time:
Approximately 2 hours (includes cooling and chilling time)
Nutritional Information: (Estimated per cupcake)
Calories: Approximately 350-400 Protein: Approximately 4g Sodium: Approximately 200mg
Conclusion:
These Homemade Hostess Cupcakes are a delightful treat that combines the comforting flavors of childhood with the quality of homemade baking. While they require a bit of effort, the results are well worth it. The moist chocolate cupcakes, fluffy marshmallow filling, rich chocolate ganache, and delicate vanilla swirl create a symphony of flavors and textures that will impress everyone. Perfect for parties, celebrations, or a special treat for yourself, these cupcakes are sure to become a favorite. Enjoy the process of creating this classic dessert and savor every delicious bite.
Question and Answers about this recipe:
Q1: Can I use a different type of chocolate for the ganache?
A: Absolutely! While semi-sweet chocolate provides a classic flavor, you can certainly experiment with different types of chocolate based on your preferences. Dark chocolate will give you a richer, more intense flavor, while milk chocolate will result in a sweeter, milder ganache. White chocolate could also be an interesting twist, though it will significantly change the overall flavor profile. Just be sure to use good quality chocolate for the best results, regardless of which type you choose. Remember that different chocolates have varying levels of cocoa butter, which may affect the ganache’s final consistency, so you might need to adjust the amount of heavy cream slightly. If the ganache becomes too thick, add a tablespoon more of cream. If it is too thin, allow it to sit and thicken at room temperature or chill for a short period.
Q2: What’s the best way to store leftover cupcakes?
A: To keep your Homemade Hostess Cupcakes fresh and delicious, store them in an airtight container in the refrigerator. The refrigerator will help keep the ganache and filling firm, preventing them from becoming too soft or melting. The cupcakes should stay good for about 3-5 days when stored properly. However, keep in mind that refrigeration can sometimes dry out baked goods slightly. To combat this, you can place a piece of bread or a damp paper towel in the container with the cupcakes to help maintain moisture. Before serving, it’s best to let the cupcakes sit at room temperature for about 15-20 minutes. This will allow the textures to soften slightly and the flavors to come forward, making them even more enjoyable.
Q3: Can I make the marshmallow filling ahead of time?
A: Yes, you can definitely make the marshmallow filling in advance to save time. After preparing the filling, store it in an airtight container in the refrigerator. It should keep well for up to 2-3 days. However, keep in mind that the filling may become firmer in the fridge. Before using it to fill the cupcakes, allow it to sit at room temperature for about 30 minutes to an hour to soften. You can also re-whip it briefly with an electric mixer to restore its fluffy texture. If the filling seems too soft after sitting at room temperature, you can chill it for a short period to firm it up. It’s important to have the right consistency for easy piping or spooning into the cupcakes.
Q4: Is there a substitute for marshmallow creme?
A: If you don’t have marshmallow creme on hand, or prefer a homemade alternative, you can try making a Swiss meringue buttercream. This involves heating egg whites and sugar over a double boiler until the sugar dissolves, then whipping them into a meringue before adding softened butter. The result is a light, stable, and delicious frosting that has a similar texture to marshmallow creme. You could also use a recipe for homemade marshmallow fluff. While it may require a bit more effort than using store-bought marshmallow creme, the homemade version offers a unique flavor and satisfaction.
Q5: My ganache is too thick/thin. How can I fix it?
A: Getting the ganache consistency just right can sometimes be tricky, but there are a few easy fixes if it’s too thick or too thin. If your ganache is too thick, it likely means there isn’t enough liquid. You can thin it out by adding a tablespoon of warm heavy cream at a time, whisking well after each addition until you reach the desired consistency. On the other hand, if your ganache is too thin, it means there’s too much liquid. In this case, you can add more chocolate chips, a tablespoon at a time, melting them into the mixture until it thickens. Another option is to let the ganache sit at room temperature or in the refrigerator for a short period. This will allow it to firm up naturally. Just be careful not to over-chill it, or it will become too hard to spread.