Description
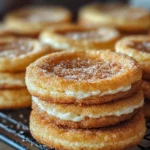
These Salted Caramel Cheesecake Cookies are a decadent treat that combines the comforting chewiness of a classic cookie with the creamy tang of cheesecake and the rich, gooey sweetness of salted caramel. Imagine biting into a soft, buttery cookie, then encountering a luscious cheesecake filling that melts in your mouth, followed by a drizzle of salty-sweet caramel that elevates the whole experience. This recipe delivers precisely that – a symphony of flavors and textures in every bite. They’re perfect for holidays, special occasions, or simply a delightful afternoon treat when you crave something truly indulgent. Each cookie is a miniature masterpiece, designed to impress and satisfy even the most discerning sweet tooth. Forget choosing between cookies, cheesecake, or caramel – have them all in one glorious package!
Why you will love this recipe
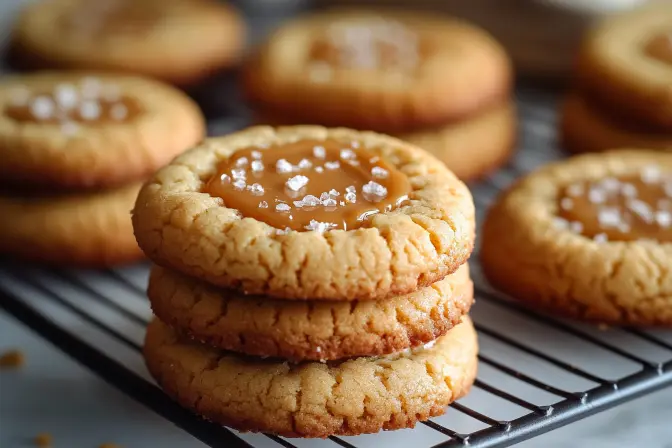
You’ll fall head-over-heels for these Salted Caramel Cheesecake Cookies for several reasons. First, they’re incredibly delicious. The combination of salty caramel, tangy cheesecake filling, and sweet cookie dough is a taste sensation that will leave you wanting more. The flavor profiles complement each other perfectly, creating a balanced and harmonious treat. Second, they’re surprisingly easy to make. While the recipe might seem a little involved at first glance, it’s actually very straightforward. The dough comes together quickly, and the cheesecake filling is a simple mix of a few ingredients. Third, they’re visually stunning. The swirl of caramel on top, sprinkled with flaky sea salt, creates a beautiful presentation that’s perfect for serving to guests or gifting to friends and family. They look like they came straight from a gourmet bakery! Fourth, these cookies are adaptable. Feel free to experiment with different caramel flavors or add chopped nuts for extra texture.
Ingredients:
For the Cookie Dough:
2 1/4 cups (280g) all-purpose flour 1/2 teaspoon baking soda 1/2 teaspoon baking powder 1/2 teaspoon salt 1/2 cup (115g) unsalted butter, softened 1/2 cup (100g) granulated sugar 1/2 cup (100g) packed light brown sugar 1 large egg 1 teaspoon vanilla extract
For the Cheesecake Filling:
4 oz (115g) cream cheese, softened 1/4 cup (50g) granulated sugar 1 teaspoon vanilla extract
For the Topping:
1/2 cup (120ml) thick caramel sauce (homemade or store-bought, but thick enough to pipe) Flaky sea salt, for sprinkling
Preparation:
Step 1: Prepare the Cheesecake Filling: In a small bowl, combine the softened cream cheese, granulated sugar, and vanilla extract. It’s crucial that the cream cheese is softened; otherwise, you’ll end up with a lumpy filling. Beat with an electric mixer until the mixture is smooth and creamy. Overmixing can introduce air, so mix just until combined. Transfer the mixture to a piping bag or a Ziploc bag. If using a Ziploc bag, seal it and snip off a small corner to create a makeshift piping bag. Refrigerate the filled bag for about 15 minutes. Chilling the filling firms it up slightly, making it easier to pipe later.
Step 2: Prepare the Cookie Dough: In a medium bowl, whisk together the flour, baking soda, baking powder, and salt. Whisking ensures that the baking soda and baking powder are evenly distributed throughout the flour, which is essential for proper leavening. If you skip this step, you may end up with cookies that don’t rise properly or have an uneven texture. Set the dry ingredients aside.
Step 3: Cream Butter and Sugars: In a large mixing bowl, cream together the softened butter, granulated sugar, and packed light brown sugar. This is a critical step for creating a light and fluffy cookie. Use an electric mixer (either a stand mixer or a handheld mixer) and beat the ingredients together for about 2-3 minutes, until the mixture is light and fluffy. Scrape down the sides of the bowl occasionally to ensure that everything is evenly combined.
Step 4: Add Egg and Vanilla: Add the large egg and vanilla extract to the creamed butter and sugar mixture. Beat until well combined. The egg helps to bind the ingredients together and adds richness to the dough, while the vanilla extract enhances the flavor. Make sure to scrape down the sides of the bowl again to ensure that everything is thoroughly incorporated.
Step 5: Combine Wet and Dry Ingredients: Gradually add the dry ingredients to the wet ingredients, mixing until just combined. Be careful not to overmix the dough. Overmixing develops the gluten in the flour, which can result in tough cookies. Mix only until the flour is incorporated. There may still be some streaks of flour remaining, which is perfectly fine.
Step 6: Assemble the Cookies: Scoop about 2 tablespoons of cookie dough and flatten it slightly in your hand to form a thick disc. The size of the cookies will affect the baking time, so try to be consistent with the amount of dough you use for each cookie. Place a heaping 1 teaspoon of cheesecake filling in the center of the disc. Fold the dough around the filling, sealing it well to fully enclose the filling. If the filling isn’t completely sealed, it may leak out during baking. Shape the dough into a tall ball (slightly domed) to encourage thickness when baking. This also helps the cookies maintain their shape.
Step 7: Chill the Cookies (Optional but Recommended): Place the filled dough balls onto the prepared baking sheet, leaving about 2 inches of space between each cookie. Chill the assembled cookies in the refrigerator for 20-30 minutes before baking to prevent excess spreading. Chilling the dough solidifies the butter, which slows down the spreading process in the oven. This step helps the cookies maintain their shape and prevents them from becoming too thin.
Step 8: Bake the Cookies: Preheat your oven to 350°F (175°C) and line a baking sheet with parchment paper or a silicone baking mat. Parchment paper or a silicone mat prevents the cookies from sticking to the baking sheet and makes cleanup easier. Bake the cookies for 10-12 minutes, or until the edges are lightly golden. The baking time will vary depending on your oven, so keep a close eye on the cookies. If desired, gently press the center of each cookie with a spoon right after baking to create a small well for topping. This creates a nest for the caramel and cheesecake topping.
Step 9: Cool the Cookies: Allow the cookies to cool on the baking sheet for 5 minutes before transferring them to a wire rack to cool completely. Cooling the cookies on the baking sheet allows them to firm up slightly before you move them. If you try to move them while they’re still too warm, they may break.
Step 10: Add Toppings: Once the cookies are completely cool, pipe a swirl of the chilled cheesecake filling on top of each cookie to create the “cheesecake” layer (optional but for the pictured look). Then, using a piping bag or Ziploc bag with the tip snipped off, pipe a thick swirl of caramel sauce over the cheesecake layer or directly on the cookie if you prefer. Sprinkle a pinch of flaky sea salt on top for that perfect sweet-salty finish. The flaky sea salt enhances the flavor and adds a delightful crunch.
COOKING Rating:
Intermediate
Serving Suggestions:
Serve these Salted Caramel Cheesecake Cookies with a cold glass of milk or a cup of hot coffee for a delightful afternoon treat. They are also perfect for serving at parties, gatherings, or as a special dessert after a meal.
Tips:
- Make sure all ingredients are at room temperature for optimal mixing.
- Don’t overmix the dough, as this can result in tough cookies.
- Chill the dough before baking to prevent excessive spreading.
- Use high-quality caramel sauce for the best flavor.
- Don’t skip the flaky sea salt – it really elevates the flavor!
- Store leftover cookies in an airtight container at room temperature for up to 3 days.
Prep Time:
30 minutes
Cook Time:
10-12 minutes
Total Time:
40-42 minutes (plus chilling time)
Nutritional Information: (estimated, per cookie)
Calories: 250 Protein: 3g Sodium: 150mg
Conclusion
These Salted Caramel Cheesecake Cookies are a delicious and impressive treat that’s sure to please. With their unique combination of flavors and textures, they are a perfect balance of sweet, salty, and creamy. They’re a bit of a project, but the results are definitely worth the effort. So go ahead, give this recipe a try and wow your friends and family with your baking skills!
Questions and Answers:
Q1: Can I use a different type of flour, such as whole wheat or gluten-free flour?
A: While you can experiment with different types of flour, using all-purpose flour is recommended for the best results. Whole wheat flour will change the texture of the cookies, making them denser and chewier. Gluten-free flour blends may work, but you may need to adjust the recipe slightly to achieve the desired consistency. Look for a gluten-free blend that’s designed for baking cookies, and be prepared to add a binder like xanthan gum if the blend doesn’t already contain it. Monitor the baking time closely, as gluten-free cookies may brown more quickly.
Q2: Can I make the cookie dough or cheesecake filling ahead of time?
A: Absolutely! Both the cookie dough and the cheesecake filling can be made ahead of time. The cookie dough can be stored in the refrigerator for up to 2 days or in the freezer for up to 2 months. Wrap the dough tightly in plastic wrap to prevent it from drying out. The cheesecake filling can be stored in the refrigerator for up to 3 days. Make sure to keep it in an airtight container to prevent it from absorbing odors from the refrigerator. When you’re ready to assemble the cookies, let the dough soften slightly if it’s been refrigerated or frozen.
Q3: Can I use a store-bought caramel sauce, or is homemade caramel sauce essential?
A: You can definitely use store-bought caramel sauce for this recipe. However, the quality of the caramel sauce will impact the overall flavor of the cookies. Look for a high-quality, thick caramel sauce that has a rich, buttery flavor. Avoid caramel sauces that are thin or overly sweet. If you’re feeling ambitious, homemade caramel sauce is always a great option. It allows you to control the ingredients and customize the flavor to your liking. There are many excellent recipes online for homemade caramel sauce.
Q4: What is the best way to get the perfect swirl of caramel on top of the cookies?
A: The key to getting a perfect swirl of caramel is to use a piping bag or a Ziploc bag with the tip snipped off. Make sure the caramel sauce is thick enough to hold its shape when piped. If the caramel sauce is too thin, it will spread out and won’t create a defined swirl. Practice piping on a piece of parchment paper before you start topping the cookies. This will help you get a feel for the pressure and speed needed to create a beautiful swirl. Start in the center of the cookie and work your way outwards in a circular motion.
Q5: My cookies spread too much in the oven. What did I do wrong?
A: There are several reasons why your cookies might have spread too much in the oven. One common reason is that the butter was too soft or melted. Make sure the butter is softened but not melted. Another reason is that the dough wasn’t chilled long enough. Chilling the dough solidifies the butter, which slows down the spreading process in the oven. Make sure to chill the dough for at least 20-30 minutes before baking. Overmixing the dough can also contribute to spreading, so be careful not to overmix. Finally, check your oven temperature to ensure it’s accurate. If your oven is too hot, the cookies may spread too quickly.