Description of this recipe
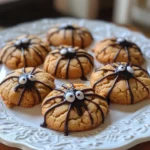
These Halloween Whoopie Pies are a delightful, festive treat perfect for celebrating the spooky season. Soft, chocolatey cookies embrace a sweet, creamy filling, all decked out in Halloween colors and decorations. They’re a fun and engaging project to bake with kids or to bring a playful touch to any Halloween gathering. The combination of rich cocoa and smooth buttercream creates a symphony of flavors and textures that will enchant both young and old.
Why you will love this recipe
These whoopie pies are more than just a dessert; they’re an experience! You’ll adore the way these treats bring a smile to everyone’s face. The moist, tender chocolate cookies, infused with a subtle hint of cocoa, melt in your mouth. The luscious buttercream filling, tinted in vibrant Halloween hues of orange and purple, adds a visual and flavorful pop that sets these whoopie pies apart. They’re incredibly customizable – let your creativity run wild with various sprinkles, candy eyes, and decorations to create personalized spooky masterpieces. Plus, they’re surprisingly easy to make, even for novice bakers. The recipe uses readily available ingredients and straightforward instructions, ensuring a successful and enjoyable baking adventure. These Halloween Whoopie Pies are guaranteed to be a crowd-pleaser, making your Halloween celebrations extra special. The sense of accomplishment from crafting these adorable, delicious treats is a reward in itself!
Ingredients:
For the Cookies:
- 2 cups (240 g) all-purpose flour
- ½ cup (45 g) unsweetened cocoa powder
- 1 ½ tsp baking soda
- ½ tsp salt
- 1 cup (200 g) granulated sugar
- ½ cup (113 g) unsalted butter, softened
- 1 large egg
- 1 cup (240 ml) buttermilk
- 1 tsp vanilla extract
For the Filling:
- 1 cup (225 g) unsalted butter, softened
- 2 cups (240 g) powdered sugar
- 1 tsp vanilla extract
- 2–3 tbsp heavy cream or milk
- Orange and purple gel food coloring
Optional Decorations:
- Halloween sprinkles
- Candy eyes
- Black or orange sanding sugar
Preparation:
Step 1: Preheat Oven: Preheat your oven to 350°F (175°C). This ensures the cookies bake evenly and develop a soft, chewy texture. Line two baking sheets with parchment paper. Parchment paper prevents the cookies from sticking and makes cleanup a breeze.
Step 2: Mix Dry Ingredients: In a medium bowl, whisk together the all-purpose flour, unsweetened cocoa powder, baking soda, and salt. Whisking ensures the dry ingredients are evenly distributed, preventing lumps and ensuring a consistent flavor and texture in the cookies. The cocoa powder adds a rich, chocolatey depth, while baking soda provides lift for a light and airy cookie. Salt enhances the flavors and balances the sweetness.
Step 3: Cream Butter & Sugar: In a large mixing bowl, cream together the softened unsalted butter and granulated sugar until light and fluffy. This crucial step incorporates air into the mixture, resulting in tender cookies. Use an electric mixer for best results, creaming for about 3-5 minutes until the mixture is pale and airy. Add the large egg and vanilla extract; mix well. The egg provides structure and richness, while vanilla extract enhances the overall flavor profile.
Step 4: Combine: Gradually alternate adding the dry flour mixture and buttermilk into the wet ingredients, mixing until just smooth. Be careful not to overmix the batter. Overmixing develops the gluten in the flour, resulting in tough cookies. The buttermilk adds moisture and tanginess, contributing to the soft and chewy texture of the whoopie pies. Start by adding about one-third of the flour mixture, followed by half of the buttermilk, then another third of the flour, the remaining buttermilk, and finish with the remaining flour.
Step 5: Scoop Batter: Drop tablespoon-sized rounds of batter onto the prepared baking sheets, spacing them about 2 inches apart. Use a cookie scoop or two spoons to ensure uniform size, which will help the whoopie pies bake evenly. The spacing prevents the cookies from spreading and sticking together during baking.
Step 6: Bake: Bake in the preheated oven for 10–12 minutes, or until the cookies spring back lightly when pressed gently in the center. Avoid overbaking, as this will result in dry cookies. The baking time may vary slightly depending on your oven, so keep a close eye on them.
Step 7: Cool: Allow the baked cookies to cool on the baking sheets for about 5 minutes before transferring them to a wire rack to cool completely. This prevents them from breaking or sticking to the pan.
Step 8: Make Filling: While the cookies are cooling, prepare the filling. In a large mixing bowl, beat the softened unsalted butter until smooth and creamy. Gradually add the powdered sugar, vanilla extract, and heavy cream or milk, beating until light and fluffy. Start with a low speed to prevent the powdered sugar from flying everywhere, then increase the speed as it incorporates. The heavy cream or milk helps to achieve the desired consistency.
Step 9: Tint Filling: Divide the buttercream filling into two separate bowls. Add orange gel food coloring to one bowl and purple gel food coloring to the other, mixing until you achieve your desired shades. Use gel food coloring rather than liquid, as it provides more intense color without thinning the frosting.
Step 10: Assemble: Once the cookies are completely cool, pipe or spread a generous amount of orange or purple filling onto the flat side of one cookie. Top with another cookie, creating a sandwich. Repeat with the remaining cookies and filling.
Step 11: Decorate: Get creative and decorate your Halloween Whoopie Pies with Halloween sprinkles, candy eyes, black or orange sanding sugar, or any other festive decorations you desire. Roll the edges of the whoopie pies in sprinkles or attach candy eyes with a dab of frosting for a spooky, fun finish.
COOKING Rating:
Easy
Serving Suggestions:
Serve these Halloween Whoopie Pies at your Halloween party, as a fun after-school treat, or package them up as spooky gifts for friends and neighbors. They pair perfectly with a glass of cold milk, hot cocoa, or a cup of coffee. They are also great as a dessert for Halloween-themed potlucks.
Tips:
- For the best flavor, use high-quality cocoa powder and vanilla extract.
- Make sure the butter is softened to room temperature for both the cookies and the filling.
- Don’t overmix the cookie batter, as this will result in tough cookies.
- If the buttercream filling is too thick, add a little more heavy cream or milk, one tablespoon at a time, until you reach the desired consistency.
- Store leftover whoopie pies in an airtight container in the refrigerator for up to 3 days.
Prep Time: 30 minutes
Cook Time: 12 minutes
Total Time: 1 hour (including cooling time)
Nutritional Information: (per whoopie pie, estimated)
Calories: 350 kcal
Protein: 3 g
Sodium: 200 mg
Conclusion
These Spooky and Delicious Halloween Whoopie Pies are a delightful treat to bake and share during the Halloween season. With their soft, chocolatey cookies, creamy, colorful filling, and festive decorations, they are sure to bring a smile to everyone’s face. Get creative with your decorations and enjoy the fun of making these spooky delights with your family and friends! They offer a perfect blend of taste and festivity, encapsulating the fun and spirit of Halloween in every bite. So, gather your ingredients, put on your favorite Halloween music, and get ready to create some memorable and delicious treats. Happy baking and Happy Halloween!
5 Questions and Answers about this recipe
Q1: Can I make these whoopie pies ahead of time?
A: Absolutely! You can bake the cookies a day or two in advance and store them in an airtight container at room temperature. You can also make the buttercream filling ahead of time and store it in the refrigerator. Just be sure to bring the filling back to room temperature and re-whip it before assembling the whoopie pies.
Q2: I don’t have buttermilk. Can I substitute something else?
A: Yes, you can make a buttermilk substitute by adding 1 tablespoon of lemon juice or white vinegar to a liquid measuring cup and filling it to the 1-cup line with milk. Let it sit for 5 minutes, and then use it in the recipe as directed. You can also use plain yogurt thinned with a little milk or sour cream as a substitute.
Q3: Can I use different food coloring for the filling?
A: Of course! Feel free to get creative with your food coloring and use any colors you like. Green and black would also be great options for a spooky Halloween theme. You could also experiment with other flavorings in the filling, such as peppermint extract or cinnamon.
Q4: What’s the best way to decorate the whoopie pies?
A: The possibilities are endless! You can roll the edges in sprinkles, attach candy eyes with a dab of frosting, drizzle melted chocolate over the top, or use edible markers to draw spooky designs. Let your imagination run wild and have fun with it!
Q5: How should I store leftover whoopie pies?
A: Store leftover whoopie pies in an airtight container in the refrigerator for up to 3 days. This will help to keep the cookies moist and the filling fresh. You can also freeze the whoopie pies for longer storage. Wrap them individually in plastic wrap and then place them in a freezer-safe bag or container. Thaw them in the refrigerator before serving.