Description of this recipe
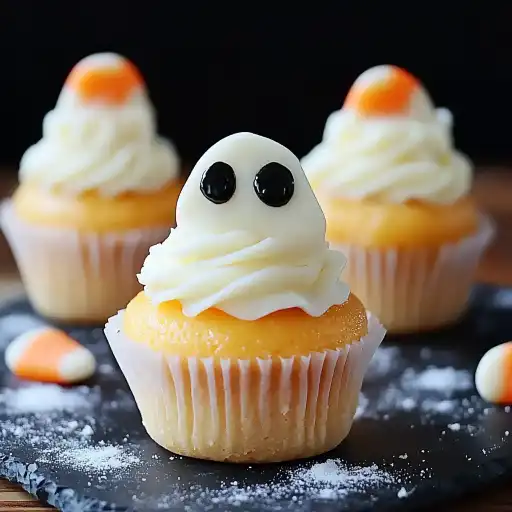
These Spooky-Cute Mini Halloween Candy Corn Cheesecakes are a delightful and festive treat perfect for Halloween parties, bake sales, or just a fun family dessert. Each miniature cheesecake is designed to resemble a candy corn, featuring distinct layers of yellow, orange, and white creamy filling atop a buttery graham cracker crust. They’re adorable, delicious, and surprisingly easy to make, guaranteeing to be a hit with both kids and adults.
Why you will love this recipe
You’ll absolutely adore these mini cheesecakes for several reasons:
- Festive and Fun: The candy corn design makes them visually appealing and perfectly themed for Halloween. They instantly add a touch of spooky-cute charm to any dessert table.
- Easy to Make: Despite their impressive appearance, these cheesecakes are relatively simple to prepare. The process involves just a few steps: making the crust, creating the filling, dividing and coloring the batter, baking, and chilling.
- Perfectly Portioned: Being mini-sized, they are ideal for portion control, allowing everyone to enjoy a sweet treat without feeling overwhelmed.
- Customizable: The toppings can be customized to your liking. Whipped cream, candy corn pieces, and Halloween sprinkles are classic choices, but you can get creative with other festive decorations.
- Delicious Flavor: The creamy cheesecake filling, combined with the buttery graham cracker crust, creates a harmonious blend of textures and flavors that is simply irresistible.
Ingredients:
For the Crust:
- 1 cup (100 g) graham cracker crumbs
- 2 tbsp granulated sugar
- 4 tbsp (56 g) unsalted butter, melted
For the Cheesecake Filling:
- 16 oz (450 g) cream cheese, softened
- ½ cup (100 g) granulated sugar
- 2 large eggs
- 1 tsp vanilla extract
- ½ cup (120 g) sour cream
For the Colors:
- Orange gel food coloring
- Yellow gel food coloring
Optional Toppings:
- Whipped cream
- Candy corn pieces
- Halloween sprinkles
Preparation:
Step 1: Prepare the Crust
Preheat your oven to 325°F (163°C). This temperature is crucial for baking the crust evenly without burning it. Line a 12-cup muffin tin with paper or silicone liners. These liners ensure that the cheesecakes can be easily removed after baking and prevent sticking.
In a medium bowl, combine the graham cracker crumbs, granulated sugar, and melted butter. Mix these ingredients thoroughly until they are well combined and the mixture resembles wet sand. This ensures that the butter evenly coats the crumbs, creating a cohesive and flavorful crust.
Press 1 tablespoon of the graham cracker mixture into the bottom of each muffin liner. Use the back of a spoon or your fingers to firmly press the mixture down, creating a compact and even crust. This step is important for providing a solid base for the cheesecake filling.
Bake the crusts in the preheated oven for 5 minutes. This brief baking time helps to set the crust and enhances its buttery flavor. Once baked, remove the muffin tin from the oven and set it aside to cool slightly while you prepare the cheesecake filling.
Step 2: Make the Filling
In a large mixing bowl, beat the softened cream cheese until it is smooth and creamy. Make sure the cream cheese is at room temperature to avoid lumps in the filling. Using an electric mixer, beat the cream cheese on medium speed until it is light and airy.
Add the granulated sugar to the cream cheese and continue to beat until the sugar is fully incorporated and the mixture is smooth. Scrape down the sides of the bowl as needed to ensure that all the ingredients are evenly mixed.
Add the eggs one at a time, beating well after each addition. Incorporating the eggs gradually helps to maintain the smooth texture of the filling. Be careful not to overbeat the mixture at this stage, as overbeating can incorporate too much air and cause the cheesecakes to crack during baking.
Stir in the vanilla extract and sour cream. Mix until the ingredients are just combined. The vanilla extract adds a hint of flavor, while the sour cream contributes to the creamy texture of the filling. Avoid overmixing to prevent the filling from becoming too thin.
Step 3: Divide & Color
Divide the cheesecake batter evenly into three separate bowls. This step is crucial for creating the distinct candy corn layers.
Leave one bowl of batter plain (white). This will form the top layer of the candy corn design.
Add a few drops of orange gel food coloring to the second bowl and stir until the batter is evenly colored. Use gel food coloring rather than liquid food coloring to avoid altering the consistency of the batter.
Add a few drops of yellow gel food coloring to the third bowl and stir until the batter is evenly colored. Adjust the amount of food coloring to achieve the desired shades of orange and yellow.
Step 4: Layer the Batter
Spoon the yellow batter onto the prepared crusts, filling each liner about one-third of the way. Use a small spoon or a piping bag for precise layering.
Next, spoon the orange batter on top of the yellow layer, filling each liner another one-third of the way. Be careful not to overfill the liners, as the cheesecakes will expand slightly during baking.
Finally, spoon the white batter on top of the orange layer, filling each liner to the top. Smooth the tops of the cheesecakes with a spatula or the back of a spoon to create an even surface.
Step 5: Bake
Bake the mini cheesecakes in the preheated oven for 18–20 minutes, or until the centers are set but still slightly jiggly. The baking time may vary depending on your oven, so keep a close eye on the cheesecakes.
Once the baking time is complete, turn off the oven, crack the door slightly, and let the cheesecakes sit in the oven for 10 minutes. This allows them to cool gradually, which helps to prevent cracking.
Step 6: Cool & Chill
Remove the muffin tin from the oven and place it on a wire rack to cool completely. Once the cheesecakes have cooled to room temperature, transfer them to the refrigerator and chill for at least 2 hours, or preferably overnight. Chilling allows the cheesecakes to firm up and develop their flavor.
Step 7: Decorate
Before serving, decorate the mini cheesecakes with whipped cream, candy corn pieces, and Halloween sprinkles, if desired. Get creative with your decorations to make them even more festive.
COOKING Rating:
Easy to Medium
Serving Suggestions:
- Serve chilled as a dessert for Halloween parties or gatherings.
- Pair with a scoop of vanilla ice cream or a dollop of whipped cream.
- Arrange on a platter with other Halloween-themed treats for a festive dessert spread.
- Serve with hot chocolate or coffee for a cozy autumn treat.
Tips:
- Ensure that the cream cheese is fully softened to prevent lumps in the filling.
- Use gel food coloring for vibrant and consistent colors.
- Avoid overmixing the batter to prevent the cheesecakes from cracking.
- Allow the cheesecakes to cool gradually in the oven to minimize cracking.
- Chill the cheesecakes thoroughly before serving for the best texture and flavor.
- For a smoother crust, pulse the graham crackers in a food processor until finely ground.
- If you don’t have muffin liners, grease the muffin tin thoroughly to prevent sticking.
- Store leftover cheesecakes in an airtight container in the refrigerator for up to 3 days.
Prep Time:
20 minutes
Cook Time:
25 minutes
Total Time:
At least 2 hours 45 minutes (including chilling time)
Nutritional Information:
Note: Nutritional information is an estimate and may vary based on specific ingredients and portion sizes.
Calories: Approximately 250-300 per mini cheesecake
Protein: 4-5g
Sodium: 150-200mg
Conclusion
These Spooky-Cute Mini Halloween Candy Corn Cheesecakes are the perfect way to celebrate the Halloween season. Their festive appearance, combined with their delicious flavor and ease of preparation, makes them a winning dessert for any occasion. Whether you’re hosting a Halloween party, baking with kids, or simply looking for a fun and festive treat, these mini cheesecakes are sure to impress. Enjoy the process of creating these delightful desserts and savor every bite of their creamy, candy corn-inspired goodness.
Questions and Answers:
Q1: Can I use a different type of crust, such as Oreo crumbs or shortbread cookies?
A: Yes, absolutely! Feel free to experiment with different types of crusts to suit your taste preferences. Oreo crumbs or shortbread cookies can be a delicious alternative to graham cracker crumbs. Just make sure to adjust the amount of butter and sugar accordingly to achieve the right consistency.
Q2: What if I don’t have gel food coloring? Can I use liquid food coloring instead?
A: While gel food coloring is recommended for its vibrant color and minimal impact on the batter’s consistency, you can use liquid food coloring if that’s all you have on hand. However, be aware that liquid food coloring may slightly alter the texture of the batter, so use it sparingly to avoid making the batter too thin.
Q3: How can I prevent the cheesecakes from cracking during baking?
A: To minimize cracking, ensure that your cream cheese is fully softened and avoid overmixing the batter. Also, let the cheesecakes cool gradually in the oven with the door slightly ajar after baking. This slow cooling process helps to prevent sudden temperature changes that can cause cracking.
Q4: Can I make these cheesecakes ahead of time?
A: Yes, you can definitely make these cheesecakes ahead of time. In fact, they taste even better after they have been chilled in the refrigerator for at least 2 hours, or preferably overnight. This allows the flavors to meld together and the texture to firm up.
Q5: Can I freeze these mini cheesecakes for longer storage?
A: Yes, you can freeze these mini cheesecakes for longer storage. Wrap each cheesecake individually in plastic wrap and then place them in a freezer-safe container or bag. They can be stored in the freezer for up to 2-3 months. When ready to serve, thaw them in the refrigerator overnight. Be aware that the texture might change slightly after freezing.Spooky-Cute Mini Halloween Candy Corn Cheesecakes
Description of this recipe
These Spooky-Cute Mini Halloween Candy Corn Cheesecakes are a delightful and festive treat perfect for Halloween parties, bake sales, or just a fun family dessert. Each miniature cheesecake is designed to resemble a candy corn, featuring distinct layers of yellow, orange, and white creamy filling atop a buttery graham cracker crust. They’re adorable, delicious, and surprisingly easy to make, guaranteeing to be a hit with both kids and adults.
Why you will love this recipe
You’ll absolutely adore these mini cheesecakes for several reasons:
- Festive and Fun: The candy corn design makes them visually appealing and perfectly themed for Halloween. They instantly add a touch of spooky-cute charm to any dessert table.
- Easy to Make: Despite their impressive appearance, these cheesecakes are relatively simple to prepare. The process involves just a few steps: making the crust, creating the filling, dividing and coloring the batter, baking, and chilling.
- Perfectly Portioned: Being mini-sized, they are ideal for portion control, allowing everyone to enjoy a sweet treat without feeling overwhelmed.
- Customizable: The toppings can be customized to your liking. Whipped cream, candy corn pieces, and Halloween sprinkles are classic choices, but you can get creative with other festive decorations.
- Delicious Flavor: The creamy cheesecake filling, combined with the buttery graham cracker crust, creates a harmonious blend of textures and flavors that is simply irresistible.
Ingredients:
For the Crust:
- 1 cup (100 g) graham cracker crumbs
- 2 tbsp granulated sugar
- 4 tbsp (56 g) unsalted butter, melted
For the Cheesecake Filling:
- 16 oz (450 g) cream cheese, softened
- ½ cup (100 g) granulated sugar
- 2 large eggs
- 1 tsp vanilla extract
- ½ cup (120 g) sour cream
For the Colors:
- Orange gel food coloring
- Yellow gel food coloring
Optional Toppings:
- Whipped cream
- Candy corn pieces
- Halloween sprinkles
Preparation:
Step 1: Prepare the Crust
Preheat your oven to 325°F (163°C). This temperature is crucial for baking the crust evenly without burning it. Line a 12-cup muffin tin with paper or silicone liners. These liners ensure that the cheesecakes can be easily removed after baking and prevent sticking.
In a medium bowl, combine the graham cracker crumbs, granulated sugar, and melted butter. Mix these ingredients thoroughly until they are well combined and the mixture resembles wet sand. This ensures that the butter evenly coats the crumbs, creating a cohesive and flavorful crust.
Press 1 tablespoon of the graham cracker mixture into the bottom of each muffin liner. Use the back of a spoon or your fingers to firmly press the mixture down, creating a compact and even crust. This step is important for providing a solid base for the cheesecake filling.
Bake the crusts in the preheated oven for 5 minutes. This brief baking time helps to set the crust and enhances its buttery flavor. Once baked, remove the muffin tin from the oven and set it aside to cool slightly while you prepare the cheesecake filling.
Step 2: Make the Filling
In a large mixing bowl, beat the softened cream cheese until it is smooth and creamy. Make sure the cream cheese is at room temperature to avoid lumps in the filling. Using an electric mixer, beat the cream cheese on medium speed until it is light and airy.
Add the granulated sugar to the cream cheese and continue to beat until the sugar is fully incorporated and the mixture is smooth. Scrape down the sides of the bowl as needed to ensure that all the ingredients are evenly mixed.
Add the eggs one at a time, beating well after each addition. Incorporating the eggs gradually helps to maintain the smooth texture of the filling. Be careful not to overbeat the mixture at this stage, as overbeating can incorporate too much air and cause the cheesecakes to crack during baking.
Stir in the vanilla extract and sour cream. Mix until the ingredients are just combined. The vanilla extract adds a hint of flavor, while the sour cream contributes to the creamy texture of the filling. Avoid overmixing to prevent the filling from becoming too thin.
Step 3: Divide & Color
Divide the cheesecake batter evenly into three separate bowls. This step is crucial for creating the distinct candy corn layers.
Leave one bowl of batter plain (white). This will form the top layer of the candy corn design.
Add a few drops of orange gel food coloring to the second bowl and stir until the batter is evenly colored. Use gel food coloring rather than liquid food coloring to avoid altering the consistency of the batter.
Add a few drops of yellow gel food coloring to the third bowl and stir until the batter is evenly colored. Adjust the amount of food coloring to achieve the desired shades of orange and yellow.
Step 4: Layer the Batter
Spoon the yellow batter onto the prepared crusts, filling each liner about one-third of the way. Use a small spoon or a piping bag for precise layering.
Next, spoon the orange batter on top of the yellow layer, filling each liner another one-third of the way. Be careful not to overfill the liners, as the cheesecakes will expand slightly during baking.
Finally, spoon the white batter on top of the orange layer, filling each liner to the top. Smooth the tops of the cheesecakes with a spatula or the back of a spoon to create an even surface.
Step 5: Bake
Bake the mini cheesecakes in the preheated oven for 18–20 minutes, or until the centers are set but still slightly jiggly. The baking time may vary depending on your oven, so keep a close eye on the cheesecakes.
Once the baking time is complete, turn off the oven, crack the door slightly, and let the cheesecakes sit in the oven for 10 minutes. This allows them to cool gradually, which helps to prevent cracking.
Step 6: Cool & Chill
Remove the muffin tin from the oven and place it on a wire rack to cool completely. Once the cheesecakes have cooled to room temperature, transfer them to the refrigerator and chill for at least 2 hours, or preferably overnight. Chilling allows the cheesecakes to firm up and develop their flavor.
Step 7: Decorate
Before serving, decorate the mini cheesecakes with whipped cream, candy corn pieces, and Halloween sprinkles, if desired. Get creative with your decorations to make them even more festive.
COOKING Rating:
Easy to Medium
Serving Suggestions:
- Serve chilled as a dessert for Halloween parties or gatherings.
- Pair with a scoop of vanilla ice cream or a dollop of whipped cream.
- Arrange on a platter with other Halloween-themed treats for a festive dessert spread.
- Serve with hot chocolate or coffee for a cozy autumn treat.
Tips:
- Ensure that the cream cheese is fully softened to prevent lumps in the filling.
- Use gel food coloring for vibrant and consistent colors.
- Avoid overmixing the batter to prevent the cheesecakes from cracking.
- Allow the cheesecakes to cool gradually in the oven to minimize cracking.
- Chill the cheesecakes thoroughly before serving for the best texture and flavor.
- For a smoother crust, pulse the graham crackers in a food processor until finely ground.
- If you don’t have muffin liners, grease the muffin tin thoroughly to prevent sticking.
- Store leftover cheesecakes in an airtight container in the refrigerator for up to 3 days.
Prep Time:
20 minutes
Cook Time:
25 minutes
Total Time:
At least 2 hours 45 minutes (including chilling time)
Nutritional Information:
Note: Nutritional information is an estimate and may vary based on specific ingredients and portion sizes.
Calories: Approximately 250-300 per mini cheesecake
Protein: 4-5g
Sodium: 150-200mg
Conclusion
These Spooky-Cute Mini Halloween Candy Corn Cheesecakes are the perfect way to celebrate the Halloween season. Their festive appearance, combined with their delicious flavor and ease of preparation, makes them a winning dessert for any occasion. Whether you’re hosting a Halloween party, baking with kids, or simply looking for a fun and festive treat, these mini cheesecakes are sure to impress. Enjoy the process of creating these delightful desserts and savor every bite of their creamy, candy corn-inspired goodness.
Questions and Answers:
Q1: Can I use a different type of crust, such as Oreo crumbs or shortbread cookies?
A: Yes, absolutely! Feel free to experiment with different types of crusts to suit your taste preferences. Oreo crumbs or shortbread cookies can be a delicious alternative to graham cracker crumbs. Just make sure to adjust the amount of butter and sugar accordingly to achieve the right consistency.
Q2: What if I don’t have gel food coloring? Can I use liquid food coloring instead?
A: While gel food coloring is recommended for its vibrant color and minimal impact on the batter’s consistency, you can use liquid food coloring if that’s all you have on hand. However, be aware that liquid food coloring may slightly alter the texture of the batter, so use it sparingly to avoid making the batter too thin.
Q3: How can I prevent the cheesecakes from cracking during baking?
A: To minimize cracking, ensure that your cream cheese is fully softened and avoid overmixing the batter. Also, let the cheesecakes cool gradually in the oven with the door slightly ajar after baking. This slow cooling process helps to prevent sudden temperature changes that can cause cracking.
Q4: Can I make these cheesecakes ahead of time?
A: Yes, you can definitely make these cheesecakes ahead of time. In fact, they taste even better after they have been chilled in the refrigerator for at least 2 hours, or preferably overnight. This allows the flavors to meld together and the texture to firm up.
Q5: Can I freeze these mini cheesecakes for longer storage?
A: Yes, you can freeze these mini cheesecakes for longer storage. Wrap each cheesecake individually in plastic wrap and then place them in a freezer-safe container or bag. They can be stored in the freezer for up to 2-3 months. When ready to serve, thaw them in the refrigerator overnight. Be aware that the texture might change slightly after freezing.